AI/ML with Jupyter on Kubernetes: JupyterHub
What is Jupyter?
Jupyter is an open-source, interactive web application for creating and running data science project Notebooks in an Integrated Development Environment (IDE). A Jupyter Notebook not only combines text, equations, multimedia, interactive code and formulas, but you can also share a Notebook among collaborators. JupyterHub hosts Notebooks and other resources as a service, so that they can be used without local installation. Teams run JupyterHub on Kubernetes to automate scaling and resource management for many users.
This lesson sets up the foundation you'll use to share and run Notebooks in later Lessons in the AI/ML with Jupyter on Kubernetes Learning Path. Rather than reinvent the wheel, this initial lesson follows the procedure explained in the JupyterHub for Kubernetes documentation, streamlining and adjusting it to form the foundation of this Learning Path.
Deploying JupyterHub
JupyterHub provides a Helm Chart to make it easier to deploy on Kubernetes clusters. Helm is a package manager for managing the deployment of applications on Kubernetes. Helm Charts are YAML files describing a set of resources, usually the components of an application or application stack, for deployment on a Kubernetes cluster.
Install Helm
Download and run helm on your Kubernetes cluster:
curl -fsSL -o get_helm.sh https://raw.githubusercontent.com/helm/helm/main/scripts/get-helm-3
chmod 700 get_helm.sh
./get_helm.sh
Verify that Helm was successfully deployed by invoking helm version after the script runs. This lesson was written and tested with Helm version 3.7.1.
Use Helm to deploy JupyterHub
With Helm in place, you can work with Charts published in repositories or create your own. You'll use Helm to fetch the JupyterHub Chart, then install it. First, add JupyterHub's URL to your list of Chart repositories.
helm repo add jupyterhub https://jupyterhub.github.io/helm-chart/
helm repo update
Helm should wish you "Happy Helming" after the repository update succeeds:
"jupyterhub" has been added to your repositories
Hang tight while we grab the latest from your chart repositories...
...Successfully got an update from the "jupyterhub" chart repository
Update Complete. ⎈Happy Helming!⎈
Next, install the JupyterHub Chart from the chart repository. No configuration is required to get a basic JupyterHub running, but you do need a config.yaml file. This example uses an empty one. To learn more about configuring JupyterHub with parameters in a YAML file, please see the JupyterHub for Kubernetes documentation.
touch config.yaml
helm upgrade --cleanup-on-fail \
  --install hub jupyterhub/jupyterhub \
  --namespace jup \
  --create-namespace \
  --version=1.2.0 \
  --values config.yaml
You'll see output something like that below, showing the application of the arguments given to the helm upgrade command.
Release "hub" does not exist. Installing it now.
NAME: hub
LAST DEPLOYED: Thu Jan 20 14:00:55 2022
NAMESPACE: jup
STATUS: deployed
REVISION: 1
TEST SUITE: None
NOTES:
Thank you for installing JupyterHub!
As this output shows, passing hub to the install argument gives a unique arbitrary name to this deployment of this chart to distinguish it from others. The deployment called hub is in its first REVISION, as you can also see.
Make sure the hub and proxy pods are running with kubectl get pods --namespace jup. Immediately after a completed helm upgrade in a new namespace on a single node Kubernetes cluster, you typically see five running pods: the continuous-image-puller, the hub, the proxy, and two user-schedulers.
If your cluster runs on a public cloud service, you may have a load balancer configured and in turn a readily accessible public IP. You can discover it by listing the Kubernetes services in the jup namespace to find the proxy-public service:
$ kubectl get service -n jup
NAME           TYPE           CLUSTER-IP       EXTERNAL-IP   PORT(S)        AGE
hub            ClusterIP      10.104.120.107   <none>        8081/TCP       11m
proxy-api      ClusterIP      10.98.157.6      <none>        8001/TCP       11m
proxy-public   LoadBalancer   10.110.127.88    <pending>     80:31353/TCP   11m
The baseline environment for most of the lessons here is a single-node minikube cluster. On minikube clusters, the EXTERNAL-IP will remain in the <pending> state. Use the minikube service subcommand to wire up a local proxy to the internal cluster IP of the proxy-public service:
minikube service -n jup proxy-public
Minikube will return information about the selected Kubernetes service followed by the relevant digits for dialing the minikube tunnel connecting your host's network to that of the cluster:
?  Starting tunnel for service proxy-public.
|-----------|--------------|-------------|------------------------|
| NAMESPACE |     NAME     | TARGET PORT |          URL           |
|-----------|--------------|-------------|------------------------|
| jup      | proxy-public |             | http://127.0.0.1:60114 |
|-----------|--------------|-------------|------------------------|
?  Opening service jup/proxy-public in default browser...
Minikube opens your default browser at the tunnel URL if possible. If not, you can paste the URL returned by minikube service into a browser on the same machine to open JupyterHub.
Provide the log in dialog with any arbitrary user name and password.
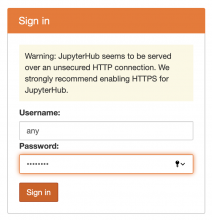
This is safe enough when access is restricted to the local host, as in this example, but for any durable and/or public instance you must configure authorization and TLS encryption. That's beyond the scope of this initial experiment. Instead, let's explore creating Jupyter Notebooks and interactive virtual Unixes for each user with JupyterHub's terminals.
After providing any text for user and password, you will land on the JupyterHub Files tab.
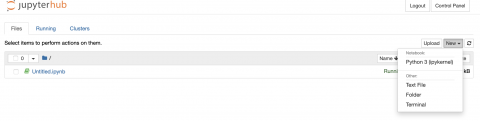
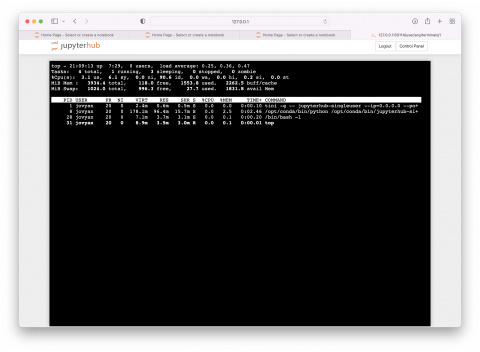
Create any new Jupyter resource by pulling down the menu at right labeled New. In the default installation you've created, you can create a Python 3-driven Notebook, a text file or a folder to store it in, or a Terminal with a Unix command line. Try creating a new terminal and running some basic commands like ls, ps and top.
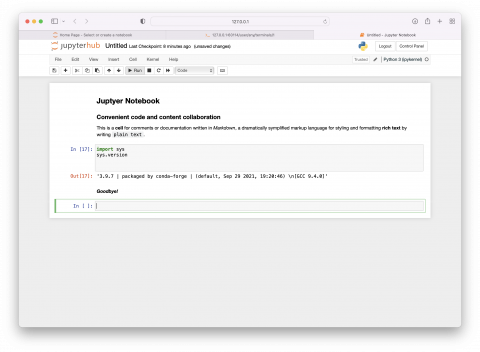
Creating a terminal is a quick way to test a script or do other chores. But JupyterHub exists to host Jupyter Notebooks. Return to the Jupyter Home Page Files tab and choose a Python 3 (ipykernel) Notebook from the New menu. A blank Notebook opens in a new browser tab.
In subsequent lessons, you'll use the JupyterHub foundation you've built here to deploy and run Notebooks for realistic analysis, with Kubernetes assisting in scaling the environments and keeping them running.